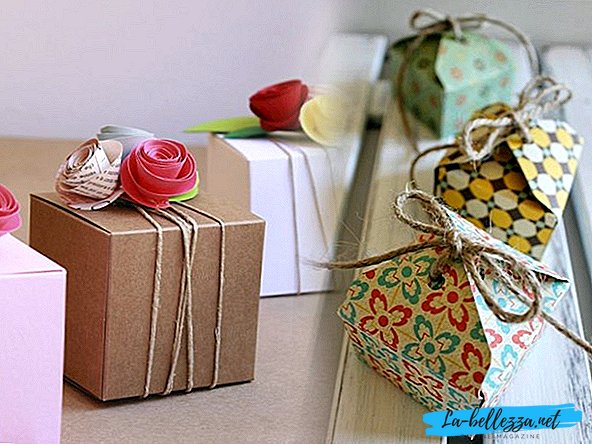
Paper boxes are a great way to decorate gifts with your own hands, to create original packaging for storing household items, as well as a great opportunity to bring creative impulses to life.
A big plus is that you can start training on plain paper or unnecessary thick cardboard, after which you can switch to performing beautiful boxes of special paper.
To make a gift box with your own hands turned out to be neat and pretty, you will not have to use the advice of professionals and follow the step by step instructions with photos and diagrams that can be found in our material.
Method number 1: Square origami box

Beautiful and light in execution - this should be the first homemade box. That is what it will be if you do it according to this simple instruction. In this case, the origami style is used.
For the manufacture of boxes will need:
- Colored or wrapping paper for gifts;
- Scissors;
- Ruler;
- Pencil;
- Ornaments as desired - satin, velvet or lace ribbon, volumetric appliqué, flower bud.
How to make a box:
To make packaging for a gift was easy, handy step by step instructions with photos. In order to make a beautiful box, you need to take care of creating the cover and the main part in the same style. The top can be presentable, bright or playful. The bottom can be made of monophonic paper of a suitable color in style.
- Begin by creating a cap for the box. It will take for this paper square shape. Sizes can be anything - depending on the idea of the author. In this case, the square will be 21.5x21.5 cm. You need to draw a square of paper diagonally to make a cross, as in the photo below.
- The lower corner must be bent so that it lies on the central point of intersection of the lined lines. You can navigate by photo. Then you need to bend the resulting fold again, but so that its edge exactly coincides with the stripe stripe. Folds must be well smoothed, so that they are printed on paper. You can use the body of the pencil. After this we unbend the square, retaining the folds necessary for further work on paper.

- Repeat these steps for the three remaining corners, resulting in a finished square with a grid of the bends we need. After this, we cut two sides from both sides, which now look like small houses.

- The next stage is done according to the photos: we fold the lid of the future box.

- After that, you can begin to perform the basis of the box. For its creation, a square of paper with a size of 3 mm less than the previous one is useful. In our case, it is 21.2x21.2 cm. The bottom is folded in the same way as the lid. The result is a beautiful box that can be decorated with ribbon, applique, flower.
- The inner ends can be glued on the inside with double tape.
We learned how to make a box of paper, but there are also more reliable materials for such an important product as gift wrapping.
For clarity, you can watch the video, where the box is also made in the style of origami:
Method number 2: Rectangular box of thick paper

Plain paper is good, but a gift box like this will not always be a good idea if its goal is to keep a heavier gift intact. For the next crafts handy thick paper is useful - that is, cardboard.
For the manufacture of boxes will need:
- Cardboard;
- Double-sided tape / glue;
- Scissors;
- Pencil;
- Ruler;
- Decorative ornaments.
How to make a box:
- First you need to print and cut the template. If this is not possible, you can redraw it onto your thick paper, taking into account the desired size. The main thing is to keep proportions.
Template:

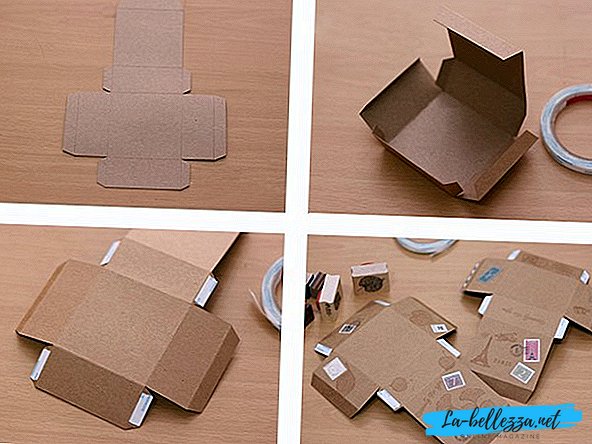
- Cutting the future box of cardboard, you need to bend all the tips in places marked with a dotted line. Since the paper is thick, you can help hold the fold lines with a sharp-pointed object (pencil, nail file, screwdriver).
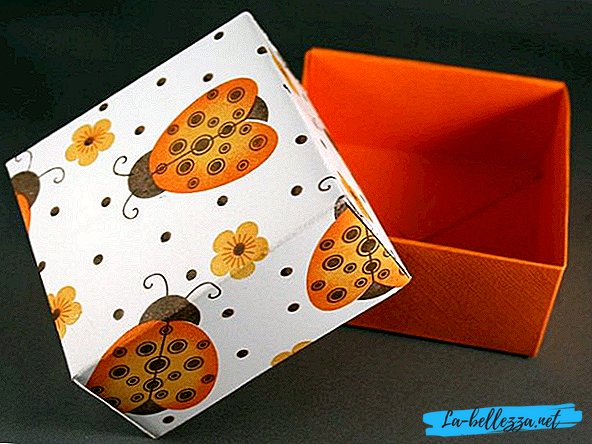
- Now, when the silhouette of the gift box has already appeared, you need to stick double-sided tape or apply glue to the places where the edges of the paper should be connected - that is, on the sides, as in the photo. Then it remains to lay the cardboard in the finished box and, if desired, decorate the product with stamps, applications, ribbons, and inscriptions.
Method number 3: Triangular box-cake

Not only simple square and rectangular boxes can be made from paper and cardboard, but also gift and packaging products of very original forms. Faster to understand the manufacturing process will help step by step photos.
As in the past case, the production of this box will greatly facilitate the work of the finished template. The edges of the cover can be wavy, which is associated with a cream, or straight. Paper colors can be chosen at your discretion, as long as everything looks harmonious together. The dimensions of the future box can be anything, as long as the bottom template is 3 mm smaller than the cover template.
For the manufacture of boxes will need:
- Cardboard or heavy paper;
- Glue;
- Scissors;
- Pencil;
- Ruler;
- Decorative ornaments - at will.
How to make a box:
Tip: for the first time you should try to make this box of plain paper to understand the principle of manufacturing, and only then proceed to the original on a more expensive paper.
Templates:
 Box cover template with straight edges.
  Box cover template with wavy edges.
  Template base box "cake".
Important: be sure to check the size of the templates, these examples may not fit each other in size. The dimensions of the base template should be slightly smaller than the dimensions of the cover template.
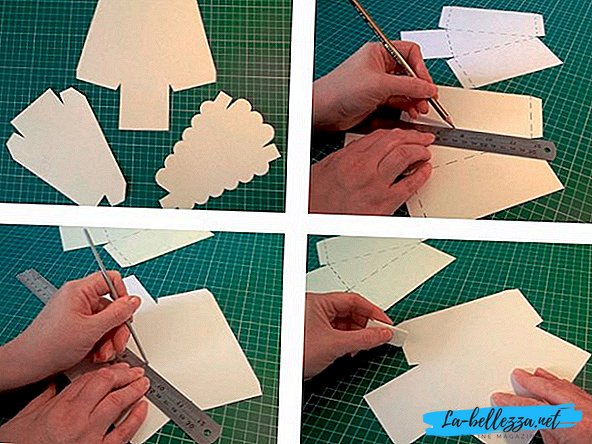
- We draw a template of a cover and a basis of a part of a box on two separate sheets. Cut out the blank paper.
If this is the final version of the product, and you want to work with cardboard, then paper templates should be attached to the cardboard and outline the edges, outline the dotted lines of the folds, and then cut out the component parts of the box.

- Then you need to make on the cardboard even folds in the points of the dotted line. You can help yourself with a ruler and a pointed object.
- Now it remains to seal the future top and bottom of the box at the joints - on the folds.

- In the final you can decorate the product with ribbon, applique, beads, flowers.
Video Tutorial: How to make a box of paper
To inspire the creators of new ideas to create these wonderful additions to any gift, you can see a few workshops from professionals. You can find out how to do it quickly and easily. box caseround box-casket and box-book.